A mould maintenance planning guide is not a paperwork exercise. It is a production-control system that protects cycle time, part quality, delivery commitments, and the useful life of a high-value tool. When maintenance is deferred until a mould fails, the cost is rarely limited to a repair. It can include rejected parts, missed shipment dates, expedited freight, unplanned machine downtime, and the loss of customer confidence.
For OEMs, procurement teams, and product engineers, the objective is straightforward: keep tooling capable of producing approved parts at the expected rate for as long as possible. Achieving that objective requires a maintenance plan built around the actual mould, resin, production volume, operating conditions, and quality requirements. A generic schedule can be a useful starting point, but it cannot replace technical judgment.
Start With the Mould’s Production Risk
Not every mould needs the same maintenance interval. A low-volume prototype tool running a non-filled resin has different demands than a multi-cavity production mould processing glass-filled material around the clock. The correct plan begins by identifying where wear, contamination, and failure are most likely to occur.
Review the tool’s cavity count, runner system, cooling configuration, ejection design, steel selection, surface finish requirements, and history of repairs. Also consider the molded material. Abrasive fillers accelerate wear at gates, shutoffs, screw heads, and moving components. Resins that release corrosive gases can affect vent areas, inserts, and polished surfaces. Materials with high processing temperatures increase thermal stress across the mould and its cooling circuits.
Part geometry matters as well. Deep ribs, thin walls, undercuts, cosmetic surfaces, and tight dimensional tolerances all raise the consequence of small tooling changes. A slight burr on a shutoff may create flash. Restricted water flow may cause a localized temperature shift that leads to warp, sink, or an unstable cycle. Maintenance planning should focus first on these known quality and production risks.
Build a Mould Maintenance Planning Guide Around Triggers
Calendar-based service intervals alone are often too blunt. A mould that has not run for six months does not receive the same wear as a tool that has completed 500,000 cycles in that period. The strongest maintenance programs combine cycle-count triggers with condition-based inspections and clear procedures for storage and restart.
A practical structure has three levels. At the machine, operators perform routine checks during production and at shift changes. At planned intervals, maintenance technicians conduct a more detailed preventive service. After a defined number of cycles, or when quality data identifies a trend, the tool receives a deeper inspection and repair assessment.
The trigger should be documented in the mould record and visible to production planning. This avoids the common problem of scheduling a tool for a long run without recognizing that it is approaching a major maintenance threshold. If a planned service will take four hours, it is better to include that time in the production schedule than lose a full day to an unexpected failure.
Daily and Per-Run Checks
Routine checks should confirm that the mould is operating cleanly and consistently. Operators should look for flash, gate vestige changes, drag marks, ejector marks, short shots, burn marks, and changes in part weight or cycle time. These are early signals, not minor cosmetic issues to ignore until the next maintenance window.
At the end of a production run, the mould should be cleaned, protected, and documented before it leaves the machine. Water lines must be drained where freezing or long-term storage is a concern. Moving components need the correct lubricant, but excessive grease can attract contamination and transfer to cavities. Cavities, cores, vents, and parting lines should be cleaned using materials that will not damage the tool surface.
Preventive Service Intervals
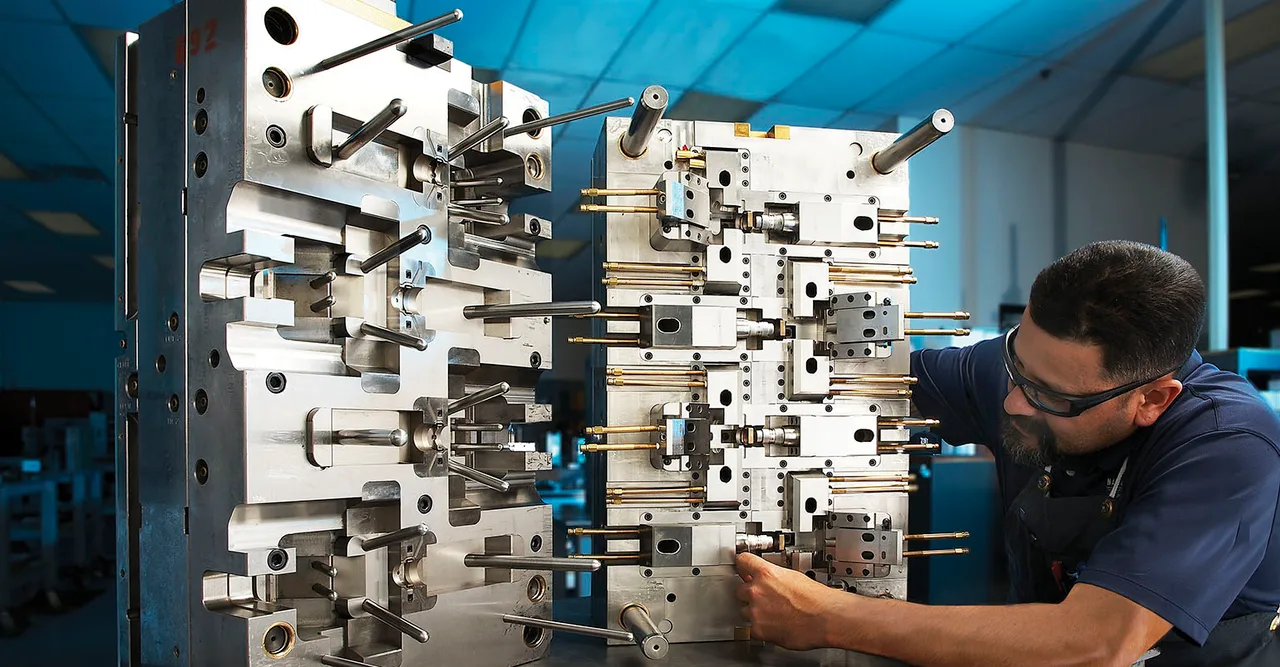
Preventive maintenance should include more than a quick polish and lubrication. The scope depends on the tool, but a planned service commonly examines ejector pins, return pins, leader pins, bushings, slides, lifters, springs, wear plates, interlocks, gates, runners, and venting. Cooling circuits need particular attention because reduced heat transfer often appears first as an inconsistent molding process rather than an obvious mould problem.
Inspecting water flow, pressure drop, and connection condition can reveal scale buildup, blockage, leaks, or damaged fittings. Where the process is sensitive, record baseline cooling performance when the mould is new or freshly refurbished. That baseline gives maintenance teams a meaningful reference instead of relying on visual judgment alone.
For high-volume tools, use cycle counts to establish service intervals and revise them using actual findings. If a component consistently shows no wear at a scheduled interval, the interval may be extended carefully. If slides begin to gall earlier than expected, the plan should be tightened and the root cause addressed. The goal is not to service every tool more often. It is to service each tool at the interval that prevents avoidable disruption.
Make Inspection Records Useful to Production
A maintenance record should help the next person make a better decision. Records that only state “cleaned and checked” create no operational value. Document the cycle count, reason for service, observed condition, repairs completed, replacement components used, measurements taken, and recommended actions before the next run.
Photographs of recurring damage, cavity surface conditions, or vent contamination can be especially useful when multiple technicians or plants support the same program. If a tool is moved between facilities, a complete service history reduces startup risk and prevents repeated troubleshooting.
For critical dimensions, establish a disciplined link between mould maintenance and quality inspection. When a part begins trending toward a specification limit, determine whether the cause is material variation, processing conditions, wear, cooling performance, or tool damage. Adjusting process settings may stabilize output temporarily, but it should not conceal a developing tooling problem.
Plan Repairs Before They Become Emergencies
Preventive maintenance does not eliminate repairs. It makes repairs more predictable and faster to execute. Every mould plan should identify critical spare components and realistic lead times for replacements. Springs, ejector pins, heaters, thermocouples, seals, fittings, and standard guide elements may be easy to stock. Custom slides, hardened inserts, cavity blocks, and hot runner components may require machining, heat treatment, or supplier coordination.
This is where in-house tooling capability creates a practical advantage. A manufacturer that can inspect, modify, machine, and test mould components in the same operation can reduce handoffs and control the quality of the repair. At Glasfil, mould design, modification, maintenance, and injection molding are managed in-house, allowing maintenance findings to be translated directly into corrective action and verified in production.
However, repair speed should not compromise diagnosis. Replacing a damaged ejector pin without checking alignment, lubrication, part sticking, and ejector plate movement may only postpone the next breakdown. A useful repair report identifies the failed component, the failure mechanism, the immediate correction, and any design or process change required to prevent recurrence.
Include Storage, Transport, and Restart Procedures
A mould can suffer damage while it is not producing parts. Long-term storage introduces corrosion risk, especially in humid environments or where cooling channels are not properly prepared. Before storage, clean the tool thoroughly, apply appropriate rust protection, protect polished surfaces, cap connections, and store the mould in a controlled location with clear identification.
Before restart, do not assume the tool is ready because it ran successfully on its previous job. Inspect cavities and moving components, confirm water circuit integrity, verify lubrication, and review the last maintenance record. The first-off approval process should confirm that parts meet the current drawing and quality standard, particularly if the mould has been stored, transported, repaired, or installed on a different press.
Transport also deserves planning. Moulds should be secured to prevent impact damage, lifting points must be verified, and exposed components should be protected. A tool that arrives with a damaged connector, cracked fitting, or misaligned slide can delay a launch before the first shot is taken.
Measure the Results That Matter
The value of maintenance planning is visible in production data. Track unplanned mould-related downtime, repair hours, scrap and rework rates, cycle-time stability, maintenance cost per cycle, and the number of repeat failures. These measures reveal whether the plan is protecting output or simply generating activity.
There is a trade-off. More frequent maintenance consumes planned capacity, while longer intervals can increase breakdown risk. The right balance depends on the cost of downtime, the availability of backup tooling, part criticality, and the production schedule. For a component that can stop an assembly line, conservative maintenance is often justified. For a low-volume service part with redundant tooling, a different approach may be reasonable.
Treat each mould as a production asset with its own operating history, not as a passive piece of equipment. When maintenance decisions are tied to cycle counts, quality evidence, and repair data, the tool becomes easier to schedule, faster to troubleshoot, and more dependable when customer demand increases.
Contact us to discuss your project, request a quotation, or arrange a technical consultation. Our team will help you determine the most cost-effective and reliable way to manufacture your part.