A tool can still produce parts and still be costing your operation money. Flash may be trimmed away, cycle time may creep up by a few seconds, or operators may compensate for inconsistent ejection. These are often the early signs behind the question: when should moulds be refurbished? The right answer is not based on tool age alone. It depends on output, part requirements, maintenance history, and the cost of allowing a manageable issue to become a production failure.
For OEMs, product developers, and procurement teams, refurbishment is a planned production decision. Done at the right time, it restores repeatability, protects part quality, and extends the useful life of a valuable asset. Delayed too long, it can lead to unplanned downtime, rejected parts, missed delivery dates, and emergency repair costs.
When Should Moulds Be Refurbished?
Moulds should be refurbished when their condition begins to affect production stability, part quality, or operating cost, but before damage requires major reconstruction. A scheduled refurbishment is usually more predictable and less expensive than responding to a tool failure during an active production run.
The clearest trigger is a measurable change in performance. This can include higher reject rates, more frequent adjustments at the press, increased maintenance intervals, or an inability to consistently hold critical dimensions. A mould that once ran efficiently at a defined cycle time but now requires slower settings to maintain quality is also signaling that an inspection is due.
Production volume matters. High-cavity tools and moulds running long production campaigns experience more wear at shutoffs, gates, slides, ejector systems, guide components, and cooling circuits. Even a well-built tool requires periodic restoration when it is exposed to repeated mechanical movement, injection pressure, heat, and resin flow.
Refurbishment is also appropriate when a program changes. A new resin, higher production demand, tighter cosmetic expectations, or a revised part design can expose weaknesses that were not relevant in the original application. In these cases, refurbishment may include modification rather than simple repair – for example, improving venting, updating cooling, strengthening wear surfaces, or changing a gate configuration to support stable molding.
The Production Signals That Should Not Be Ignored
Quality problems rarely appear without a process cause. Before attributing defects to material or machine settings, assess the condition of the mould. When the same defect recurs despite controlled processing, tooling wear or damage should be investigated.
Flash around the parting line, inserts, or slide areas can indicate worn shutoffs, poor alignment, or damage to mating surfaces. Minor flash may appear easy to manage, but manual trimming adds labor and can conceal progressive mould wear. If flash increases as production continues, the tool should not simply be adjusted and returned to service.
Dimensional variation is another serious signal, particularly for components used in automotive, electrical, plumbing, automation, and assembly applications. Worn cores and cavities, damaged inserts, inconsistent cooling, or unstable ejection can change the geometry of a molded part. For a component with functional fits, even small deviations can create downstream assembly issues that are much more costly than a planned tool refurbishment.
Surface defects can point to several tooling conditions. Scratches, drag marks, gloss variation, burn marks, and flow-related cosmetic issues may result from worn polish, blocked vents, corrosion, or inadequate cooling performance. The diagnosis matters. Re-polishing a cavity can improve appearance, but it will not solve a ventilation or cooling problem that is creating defects at the source.
Pay close attention to ejection. Parts that stick, eject unevenly, show ejector marks, or require excessive mold-release intervention create cycle delays and raise the risk of part damage. Worn ejector pins, return pins, bushes, or plates can also cause greater damage if operation continues. Ejection systems should move smoothly and return precisely every cycle.
Cycle Time and Downtime Are Cost Indicators
A mould does not need visible damage to justify refurbishment. A gradual increase in cycle time can be enough. If cooling is less effective because water lines are scaled, corroded, or restricted, the press may need extra seconds to produce parts that meet dimensional and cosmetic requirements. Across tens of thousands of cycles, those seconds become a direct capacity cost.
Unplanned stops are equally revealing. If technicians repeatedly address sticking slides, blocked gates, poor water flow, broken springs, or inconsistent ejector movement, the tool is consuming maintenance resources that should be reserved for planned preventive work. Repeated small repairs are often a sign that the mould needs a more complete assessment.
The decision should be based on total cost, not repair invoice cost alone. Consider scrap, sorting, rework, lost machine availability, maintenance labor, expedited shipments, and the consequences of a late delivery to your customer. A refurbishment that restores the tool to predictable operation may be the lower-cost option even when the mould is still technically capable of producing parts.
What a Proper Mould Refurbishment Should Include
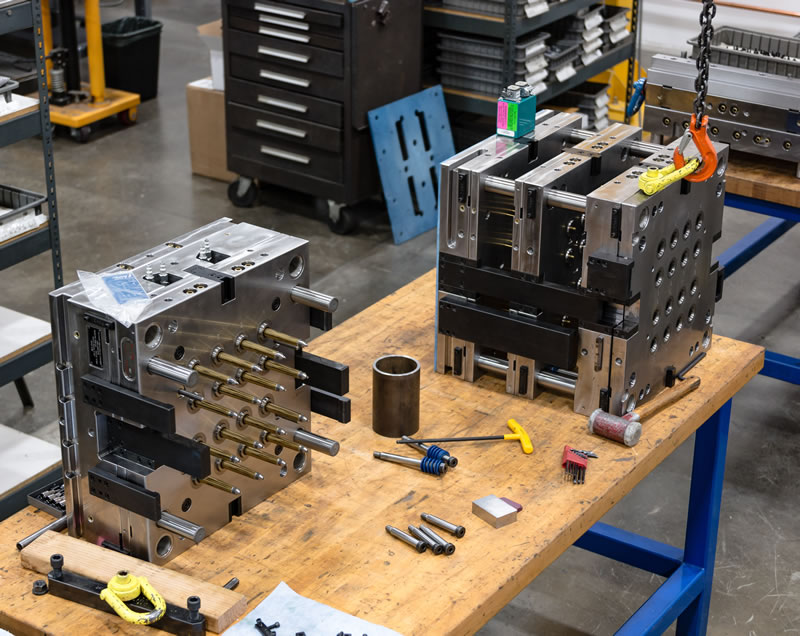
Refurbishment should begin with inspection and diagnosis, not an assumption that every issue requires the same repair. The tool should be disassembled as needed to evaluate cavities, cores, inserts, slides, lifters, ejector components, guide elements, parting surfaces, gates, vents, and cooling channels.
The required scope depends on the tool and its application. A light refurbishment may involve cleaning, polishing, lubrication, replacement of standard wear components, and restoration of vents. A more extensive project can require weld repair, re-machining, insert replacement, re-texturing, coating, alignment correction, or cooling-system service.
For tools producing technical components, inspection should include critical dimensions and functional surfaces. Repairs that restore appearance but do not re-establish geometric accuracy will not protect production. The target is not simply to make the mould look maintained. It is to return it to a stable, repeatable condition at the required process window.
Cooling deserves particular attention. Poor temperature control affects cycle time, shrinkage, warpage, surface quality, and dimensional consistency. Cleaning water channels can be beneficial, but some older tools may need a more substantial cooling review if the part has high precision requirements or if output targets have increased.
After refurbishment, the mould should be tested under production-relevant conditions. A trial should verify filling, packing, cooling, ejection, cycle time, and part quality. For critical programs, compare the results with approved samples and established dimensional requirements. Documentation of the work completed and the test results provides a stronger basis for future maintenance planning.
Refurbishment, Repair, or Replacement?
These options serve different purposes. Repair addresses a specific failure or defect, such as a broken ejector pin, damaged cavity, or leaking water line. It is often urgent and narrowly focused. Refurbishment is broader: it restores worn systems and surfaces before multiple issues create a production interruption.
Replacement becomes the better option when the base tool has reached a condition where repeated restoration no longer offers reliable value. Severe corrosion, widespread cracking, major design limitations, obsolete components, or a substantial increase in required production volume can make a new mould more economical. The same is true when the part design has changed enough that modification would compromise tool integrity or output.
There is no universal shot-count threshold for this decision. Resin type, filler content, tool steel, surface treatment, cavity count, operating conditions, and maintenance discipline all influence mould life. Glass-filled materials, for example, can accelerate wear in gates, cavities, and moving components. A lower-volume tool molding abrasive material may require attention sooner than a high-volume tool running a less demanding resin.
Build Refurbishment Into the Production Plan
The most reliable approach is preventive. Track run hours, cycle counts, defect trends, downtime events, maintenance actions, and changes in cycle time. This information turns refurbishment from a reactive expense into a scheduled decision supported by production data.
Set inspection intervals based on the tool’s actual duty rather than a calendar date alone. A high-volume mould for a critical customer program may need condition checks between scheduled runs. A lower-volume tool in storage needs preservation, corrosion protection, and inspection before restarting production. Both require control, but the risks are different.
An integrated manufacturing partner can make this process more effective because mould maintenance, tool modification, and injection moulding are managed close to the production floor. At Glasfil, in-house tooling capability allows wear patterns and part-quality data to inform the refurbishment scope directly, reducing handoffs between diagnosis, repair, testing, and return to production.
The best time to refurbish a mould is while you still control the schedule. Review the tool when quality begins to drift, cycle time rises, or maintenance becomes repetitive, then plan the work before a preventable failure decides the timing for you.
Contact us to discuss your project, request a quotation, or arrange a technical consultation. Our team will help you determine the most cost-effective and reliable way to manufacture your part.