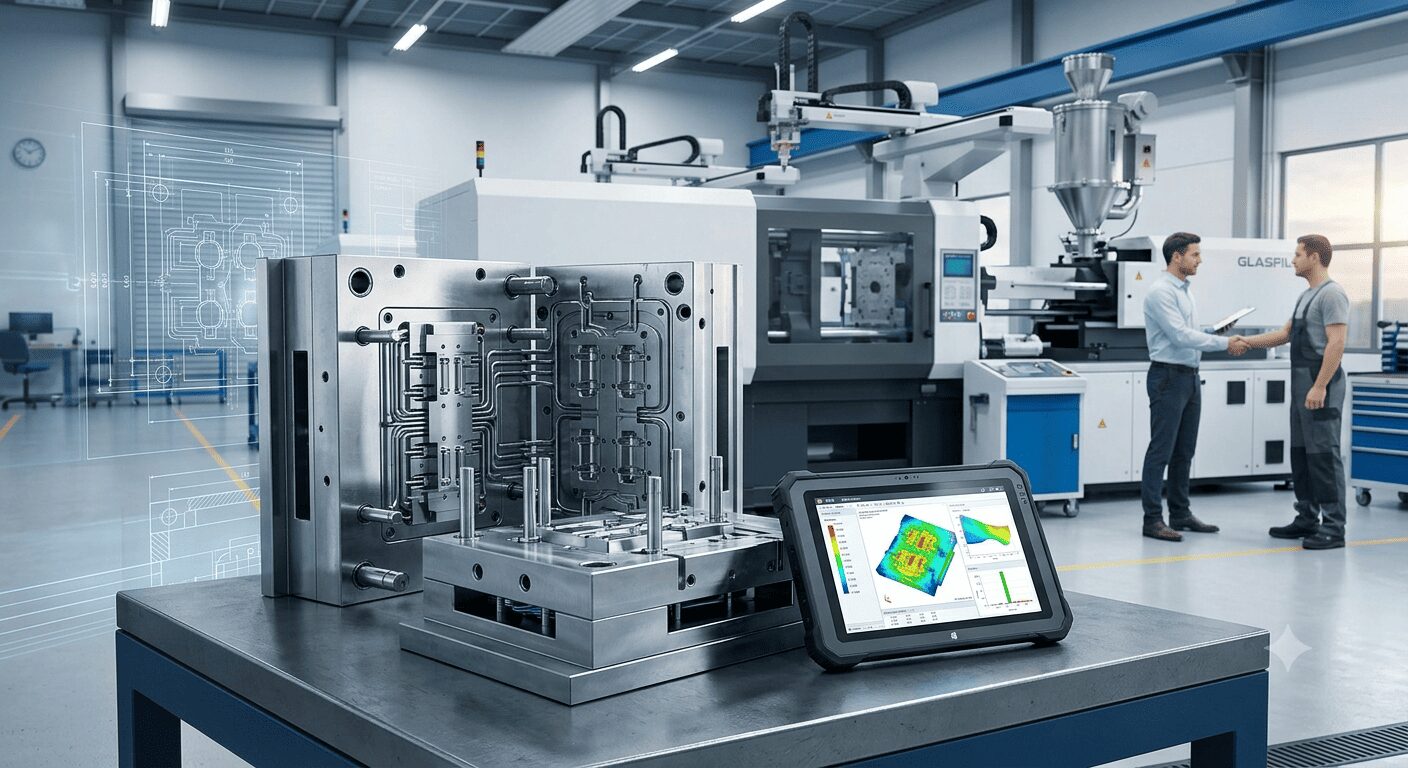
A tool can be built to the correct drawing and still create costly delays on the moulding floor. The difference is preparation. Knowing how to prepare production tooling means planning for the actual production environment: the resin, machine, cycle time, quality requirements, operator handling, and expected production volume. It is the work that turns a finished mould into a dependable manufacturing asset.
For product developers, OEMs, and procurement teams, tooling preparation should begin well before the first production order. A compressed launch schedule is not a reason to skip validation steps. It is a reason to bring design, tooling, moulding, and quality decisions under control early.
How to Prepare Production Tooling Before Production
Production tooling preparation starts with a clear definition of what the tool must achieve. This includes more than part geometry. The team needs approved 2D and 3D data, dimensional tolerances, cosmetic standards, resin specifications, annual volume forecasts, packaging requirements, and any secondary operations such as assembly, pad printing, ultrasonic welding, or insert installation.
Without this information, the toolmaker may produce a mould that forms the part but does not support the final manufacturing process efficiently. A tight tolerance on a mating feature, for example, may require specific steel selection, tighter process controls, or a measurement method that cannot be added as an afterthought.
Confirm the part is ready for tooling
Before steel is cut, review the part for moldability. Draft angle, wall-thickness consistency, rib design, gate location, weld lines, shrinkage, sink risk, undercuts, and ejection all need to be assessed against the selected plastic material. A part that looks acceptable in CAD may still require expensive side actions, difficult hand-loaded inserts, or a cycle time that does not support the target cost.
This is also the point at which to determine whether the design needs to accommodate material behaviour. Glass-filled resins, flame-retardant grades, recycled-content materials, and engineering polymers each create different demands on the mould. Some are abrasive and require hardened steel. Others are sensitive to moisture or processing temperature. Tooling decisions must reflect the material that will actually run in production, not a generic resin category.
Match the mould to production volume and machine capacity
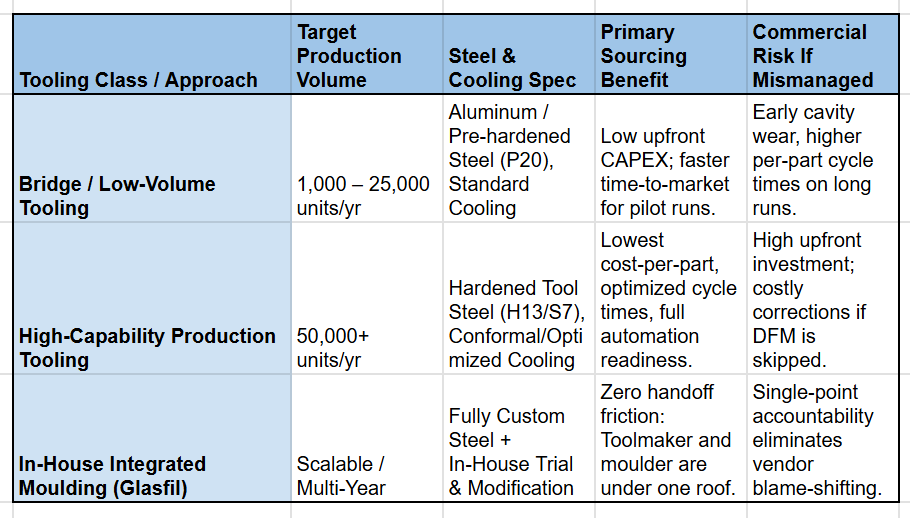
Build for Process Stability, Not Only Part Appearance
A clean first-off sample is not enough. Production tooling must produce acceptable parts repeatedly across planned shifts, operators, and material lots. This is where cooling, venting, gating, and ejection become commercial decisions rather than purely technical details.
Cooling circuits should be designed to remove heat evenly and support the target cycle time. Poor cooling can cause warpage, uneven shrinkage, long cycles, and unstable dimensions. In high-volume programs, even a few seconds added to the cycle can significantly affect output and cost.
Venting deserves the same attention. Insufficient vents can lead to burn marks, short shots, weak knit lines, and inconsistent fill. Proper vent locations, vent depth, and regular cleaning procedures protect both cosmetic quality and tool performance.
The gate system should also be selected based on the part and production method. A cold runner may be practical for lower volumes or simple parts. A hot runner can reduce material waste and support automation, but it adds cost, maintenance needs, and process complexity. There is no universal best choice. The right system is the one that supports quality, volume, resin behaviour, and total program cost.
Validate the Tool Through Structured Trials
Tool trials are the point where design assumptions meet actual material and machine behaviour. A disciplined trial plan prevents teams from making rushed changes based on a single good or bad shot.
Start with a documented mould trial that records material grade, moisture condition, melt temperature, mould temperature, injection speed, holding pressure, cooling time, cycle time, and observed defects. The goal is to establish a controlled processing window, not simply find settings that produce one acceptable sample.
Parts should be inspected against the agreed quality plan. Critical dimensions, visual surfaces, functional fits, part weight, warpage, and assembly performance should be checked. Where a component has regulatory, safety, or customer-specific requirements, validation should include the necessary tests before production approval.
A trial may reveal that the mould needs modification. Common corrections include adjusting gates, improving venting, changing ejector locations, modifying shutoffs, refining cooling, or compensating dimensions for actual shrinkage. This is normal. What matters is having in-house capability and a clear engineering process to make changes quickly without losing control of revision status.
For demanding programs, use several trial stages. The initial trial confirms that the tool fills and ejects correctly. A later capability trial verifies repeatability at production conditions. A pre-production run confirms that the entire workflow, including inspection, packing, labelling, and shipping preparation, performs as intended.
Prepare Tooling for Quality Control and Traceability
A production-ready mould needs a defined quality framework. Inspection criteria should be agreed before the first approved batch, including critical-to-quality dimensions, sampling frequency, measurement equipment, visual standards, and response procedures for nonconforming parts.
Create a documented tool history from the beginning. Record steel grades, mould components, approved revisions, trial results, process parameters, repair activity, and replacement parts. This information is essential when a tool is transferred between plants, restarted after a long production gap, or modified for a design update.
Traceability is particularly valuable for automotive, electrical, utility, and industrial applications. If an issue appears in the field, the manufacturer should be able to identify the material lot, production date, machine, cavity, process settings, and inspection results associated with the affected components.
Establish Maintenance Before the First Production Run
Mould maintenance is easiest to manage when it is planned before the tool begins operating. Waiting for flash, sticking parts, poor cooling, or cavity damage turns routine prevention into unplanned downtime.
A practical maintenance schedule distinguishes between daily care, periodic service, and major refurbishment. Daily actions may include cleaning vents, checking water lines, applying approved rust protection, and inspecting moving components. Periodic service can involve polishing, checking ejector wear, inspecting gates, and confirming cooling performance. Major service may include replacing worn inserts, repairing damaged cavities, or restoring shutoff surfaces.
Spare components should be identified for parts most likely to wear or fail, such as ejector pins, springs, seals, heaters, thermocouples, and hot runner components. The required spares depend on tool complexity and production risk. For a high-output mould supporting a critical customer program, keeping key replacement parts available can prevent an extended interruption.
Plan the Handoff From Toolroom to Production
The final step is not simply moving the mould to a press. The production team needs a complete handoff package that includes approved process settings, setup instructions, water and electrical connections, material requirements, quality documents, packing instructions, maintenance requirements, and escalation contacts.
This handoff is especially valuable when production will run across multiple shifts or locations. It reduces reliance on individual knowledge and makes repeat orders easier to start. It also gives procurement and program teams a more accurate view of the program’s readiness.
At Glasfil, tooling design, fabrication, modification, moulding, and quality control are managed in-house so that trial findings can move quickly into practical corrections. That level of control shortens the gap between a first sample and stable repeat production.
Well-prepared production tooling does more than protect the mould. It protects launch timing, part consistency, and the confidence that your supply chain can meet demand when the product reaches the market.
A late launch or an unstable mould directly threatens your supply chain reliability and unit margins. Partner with an integrated manufacturing team that takes full accountability from tooling design through finished production. Contact us today.