A part can meet every dimensional requirement and still be rejected because its color is wrong. A faint yellow cast, black speck, silver-gray streak, or uneven shade can signal anything from a simple handling issue to material degradation inside the barrel. Understanding what causes plastic discoloration is therefore not a cosmetic exercise. It is a practical way to protect part quality, production yield, and customer confidence.
For injection-molded components, color variation should be investigated as a process condition with multiple possible inputs: resin, additives, drying, machine settings, mold condition, and the surrounding production environment. The fastest solution comes from separating those inputs methodically instead of adjusting temperatures or adding colorant without evidence.
What Causes Plastic Discoloration During Injection Molding?
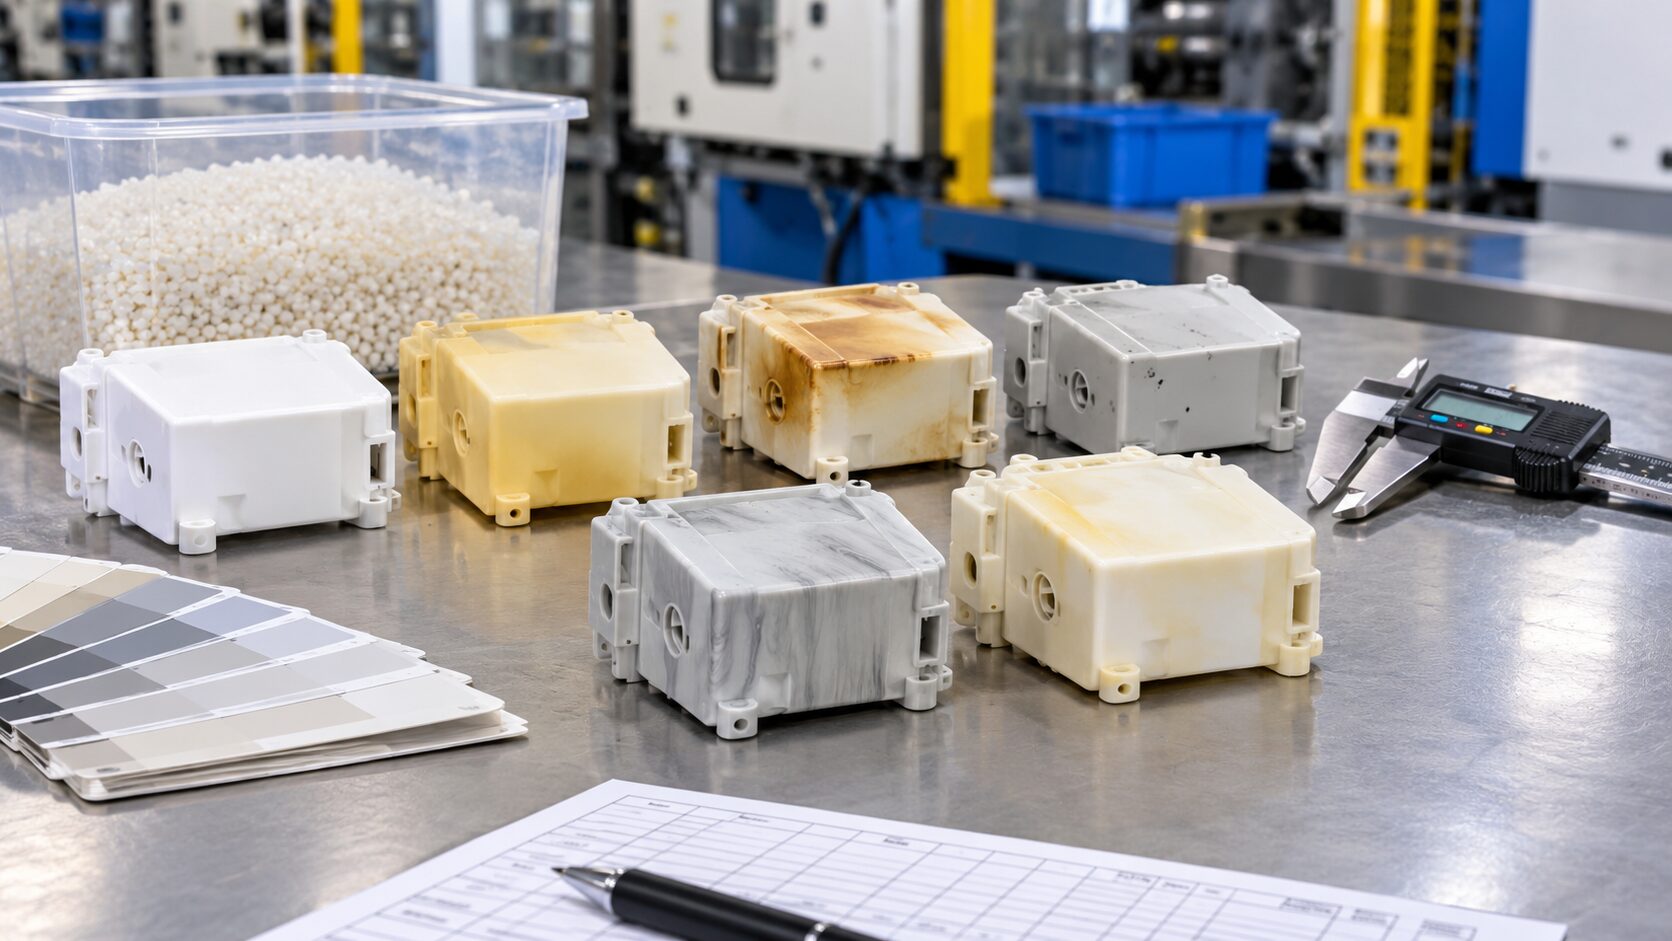
Plastic discoloration occurs when the polymer, pigment, or surface of the finished part changes from its intended appearance. The visible result may be yellowing, browning, dark streaks, black specks, whitening, fading, blotchiness, or color differences between production lots.
Some discoloration is limited to appearance. In other cases, it is evidence that the polymer has degraded, absorbed moisture, been contaminated, or experienced excessive heat history. That distinction matters for OEMs and product developers. A cosmetic defect on an interior furniture component may be manageable within an approved color tolerance. Similar discoloration on an electrical housing, automotive trim part, or water-meter component may require a deeper review of mechanical performance and long-term stability.
The root cause often depends on the resin family. Polypropylene and polyethylene can oxidize under excessive heat and exposure to air. Engineering polymers such as polycarbonate, nylon, ABS, and PBT can be particularly sensitive to drying conditions, residence time, or contamination. A good troubleshooting process always begins with the exact material grade, color system, recycled content level, and molding history.
Heat Exposure and Thermal Degradation
Excessive heat is one of the most common sources of yellowing and browning. Every polymer has a processing window. When melt temperature is too high, or the resin remains at processing temperature for too long, polymer chains can break down. Oxidation and degradation byproducts change how light reflects from the material, creating a visible color shift.
High barrel temperatures are not the only issue. A setting may appear correct while the actual melt temperature is elevated because of shear. High screw speed, restrictive gates, narrow flow paths, or excessive back pressure can add shear heat to the melt. In these cases, reducing the displayed barrel temperature alone may not solve the problem.
Long residence time is equally important. Material left in the barrel during a production interruption, slow cycle, or low-shot-volume run continues to receive heat. Dead zones at the screw tip, check ring, nozzle, or adapter can trap material for much longer than the intended cycle. When that degraded material eventually releases, it may produce brown streaks or black specks intermittently rather than across every shot.
Moisture, Drying, and Hydrolysis
Hygroscopic materials absorb moisture from the air. Nylon, PET, PBT, polycarbonate, and ABS are common examples. If they are processed without proper drying, moisture can react with the molten polymer and cause hydrolysis. The part may show yellowing, silver streaks, splay, haze, reduced gloss, or brittleness.
Dryer temperature alone does not confirm that resin is dry. The material also needs sufficient drying time, correctly conditioned air, and protected transfer from dryer to machine hopper. A dryer with poor dew-point performance, an open hopper, or frequent material exposure during handling can reintroduce moisture before molding begins.
For critical parts, verify moisture content against the resin supplier’s specification rather than relying only on dryer settings. This is particularly valuable when a new resin lot, color concentrate, or regrind percentage has been introduced. It prevents teams from chasing mold or machine issues when the underlying problem is material conditioning.
Contamination in Resin, Colorant, or Regrind
Foreign material can create highly visible defects even at very low levels. Contamination may enter through mixed resin grades, incorrect masterbatch, poorly cleaned conveying equipment, dusty storage conditions, degraded purge material, or recycled content with inconsistent composition.
Black specks commonly point to charred polymer, but they can also result from carbonized contamination or residue released from equipment. White or pale streaks may be caused by incompatible resin, moisture, or poorly dispersed additives. A random color shift between boxes can indicate inconsistent masterbatch dosing, mixed virgin and regrind ratios, or a supplier lot variation.
Regrind requires particular control. It can be an effective, cost-conscious part of a molding program when the material is clean, correctly identified, and used within a validated percentage. However, each additional heat history can affect color stability, especially in light shades, transparent materials, or resins with limited thermal tolerance. Regrind from start-up parts, purges, or mixed production should never be treated as interchangeable with controlled in-process regrind.
Pigment and Additive Issues
Not every pigment performs the same way under heat, UV exposure, chemicals, or repeated processing. An approved color may be stable for a short-run indoor part but unsuitable for a component exposed to sunlight, detergents, automotive fluids, or elevated service temperatures.
Poor dispersion can also cause marble-like appearance, streaks, or localized shade variation. This may occur when masterbatch is not mixed consistently, when dosing equipment is inaccurate, or when the base resin and color concentrate have incompatible carrier systems. The problem can become more noticeable when a part has thick and thin sections because cooling rate and crystallinity can influence the final appearance.
For demanding applications, color selection should be treated as an engineering decision. The pigment package, resin grade, additive package, and anticipated service environment need to work together. A sample that looks acceptable at first-off inspection may still yellow or fade after UV, heat-aging, or chemical-exposure testing.
Tooling and Machine Conditions That Affect Color
Mold condition has a direct effect on surface appearance. Rust, oil, release agent buildup, corrosion residue, or deposits in vents can transfer to the part or alter the way its surface reflects light. Inadequate venting can trap gas, leading to burn marks near the end of fill. These marks are often mistaken for a resin color issue, but they are created when compressed air and volatile gases overheat during injection.
The machine should be examined with the same discipline. Worn screw and barrel components can create inconsistent shear and leave stagnant material in damaged areas. Heater-band failure, poor temperature calibration, nozzle leakage, or an unsuitable screw design can also affect melt quality. A color issue that persists across different molds on the same press deserves a machine-focused investigation.
At Glasfil, in-house tooling and molding control allow teams to assess the complete production chain rather than assigning blame to a single variable. That matters when visual quality depends on the interaction between mold design, resin behavior, and processing discipline.
A Practical Diagnostic Sequence
Color troubleshooting becomes faster when changes are controlled. Avoid changing drying conditions, barrel settings, masterbatch ratio, and mold parameters at the same time. Doing so may hide the actual cause and make it difficult to reproduce an acceptable process.
Use this sequence to narrow the problem:
- Define the defect precisely. Record its color, location, frequency, cavity number, production time, and whether it appears on first shots, after pauses, or throughout the run.
- Check material history. Confirm resin grade, lot number, color concentrate, regrind percentage, storage conditions, and verified moisture content.
- Review the heat history. Compare barrel zones, actual melt temperature where possible, screw speed, back pressure, cycle time, shot size, and residence time.
- Inspect mold and machine sources. Look for blocked vents, deposits, corrosion, leaks, heater issues, dead spots, and signs of degraded material during purging.
- Run a controlled trial. Process confirmed clean, correctly dried virgin material using documented settings. Then introduce one variable at a time until the defect returns or is eliminated.
Retain good and defective parts from each trial. Visual comparisons are useful, but measurable color data provides stronger evidence when parts must meet customer specifications. Depending on the application, a spectrophotometer and defined color tolerance can distinguish normal lot variation from a process deviation that requires containment.
Preventing Discoloration Before Production Starts
The most economical time to prevent color defects is before serial production. Material selection should account for processing temperature, wall thickness, expected UV exposure, chemical contact, and the accepted use of regrind. Mold design should provide appropriate venting, balanced filling, and gate locations that minimize unnecessary shear.
Production documentation also matters. Approved drying instructions, barrel profiles, cycle parameters, purge procedures, masterbatch ratios, and startup checks provide a repeatable baseline. For multi-cavity tools, cavity-level inspection can identify a localized tooling problem before it becomes a full production loss.
Discoloration is rarely solved by increasing pigment concentration. When the underlying cause is moisture, thermal damage, contamination, or trapped gas, more colorant may only mask the defect temporarily while increasing cost and creating a new source of variation. The better approach is to stabilize the process that produced the wrong color in the first place.
A consistent color is the visible result of controlled material, tooling, and processing decisions. When a part changes shade, treat it as useful production data. The right investigation can protect more than appearance – it can prevent scrap, delays, and a larger quality issue from reaching the customer.
Contact us to discuss your project, request a quotation, or arrange a technical consultation. Our team will help you determine the most cost-effective and reliable way to manufacture your part.