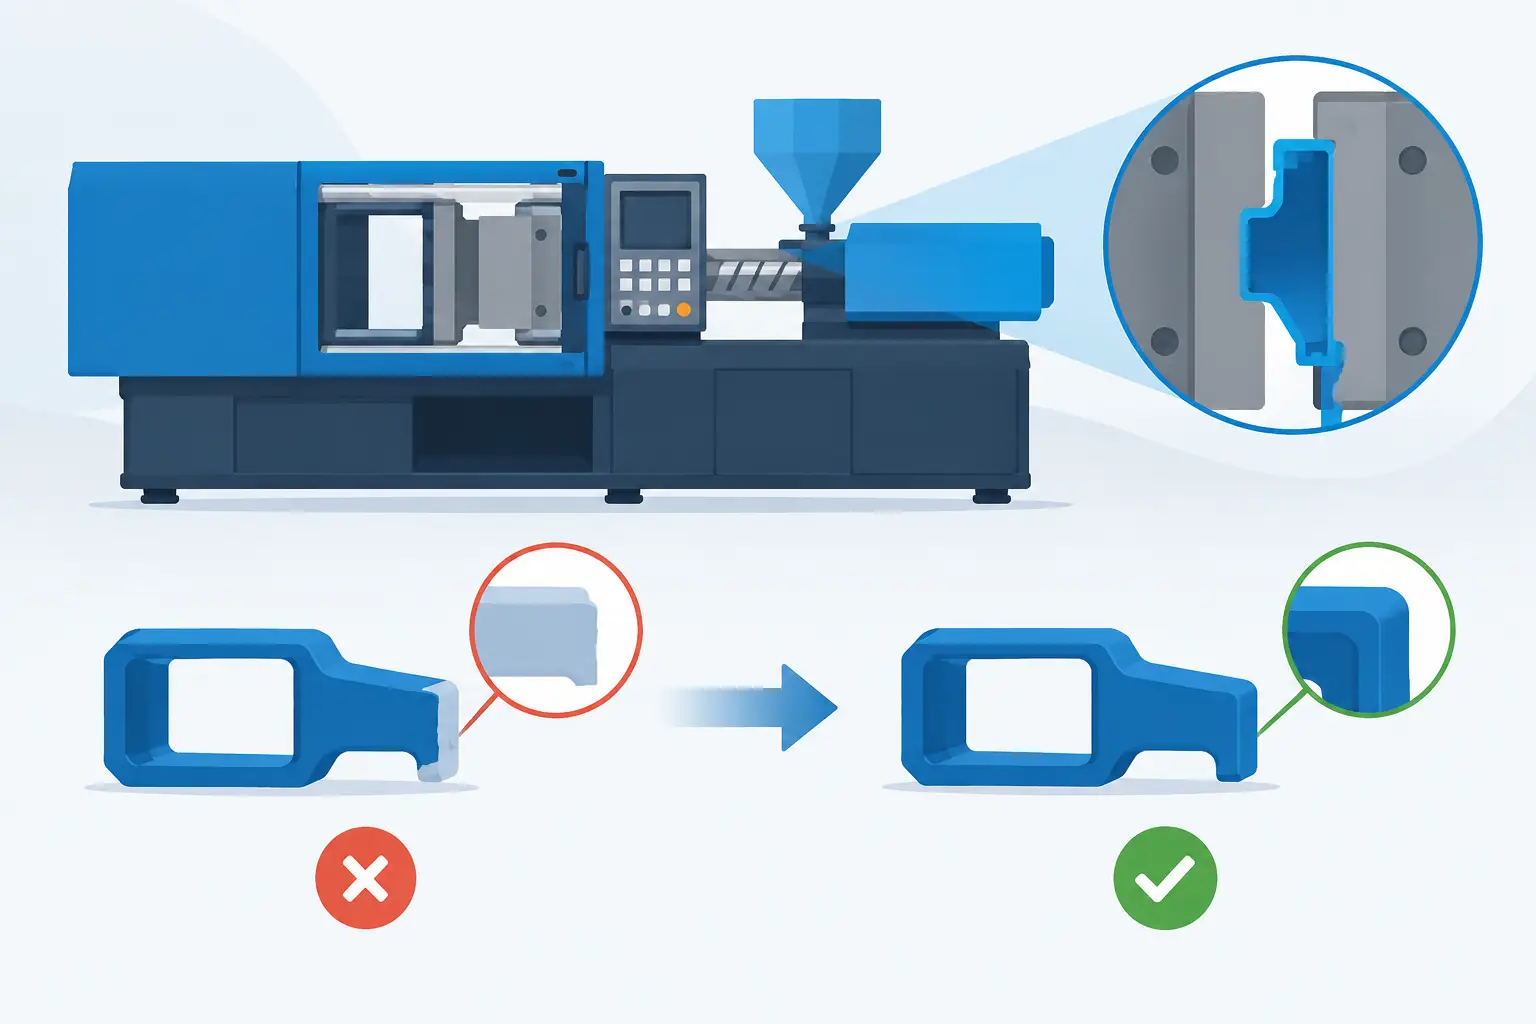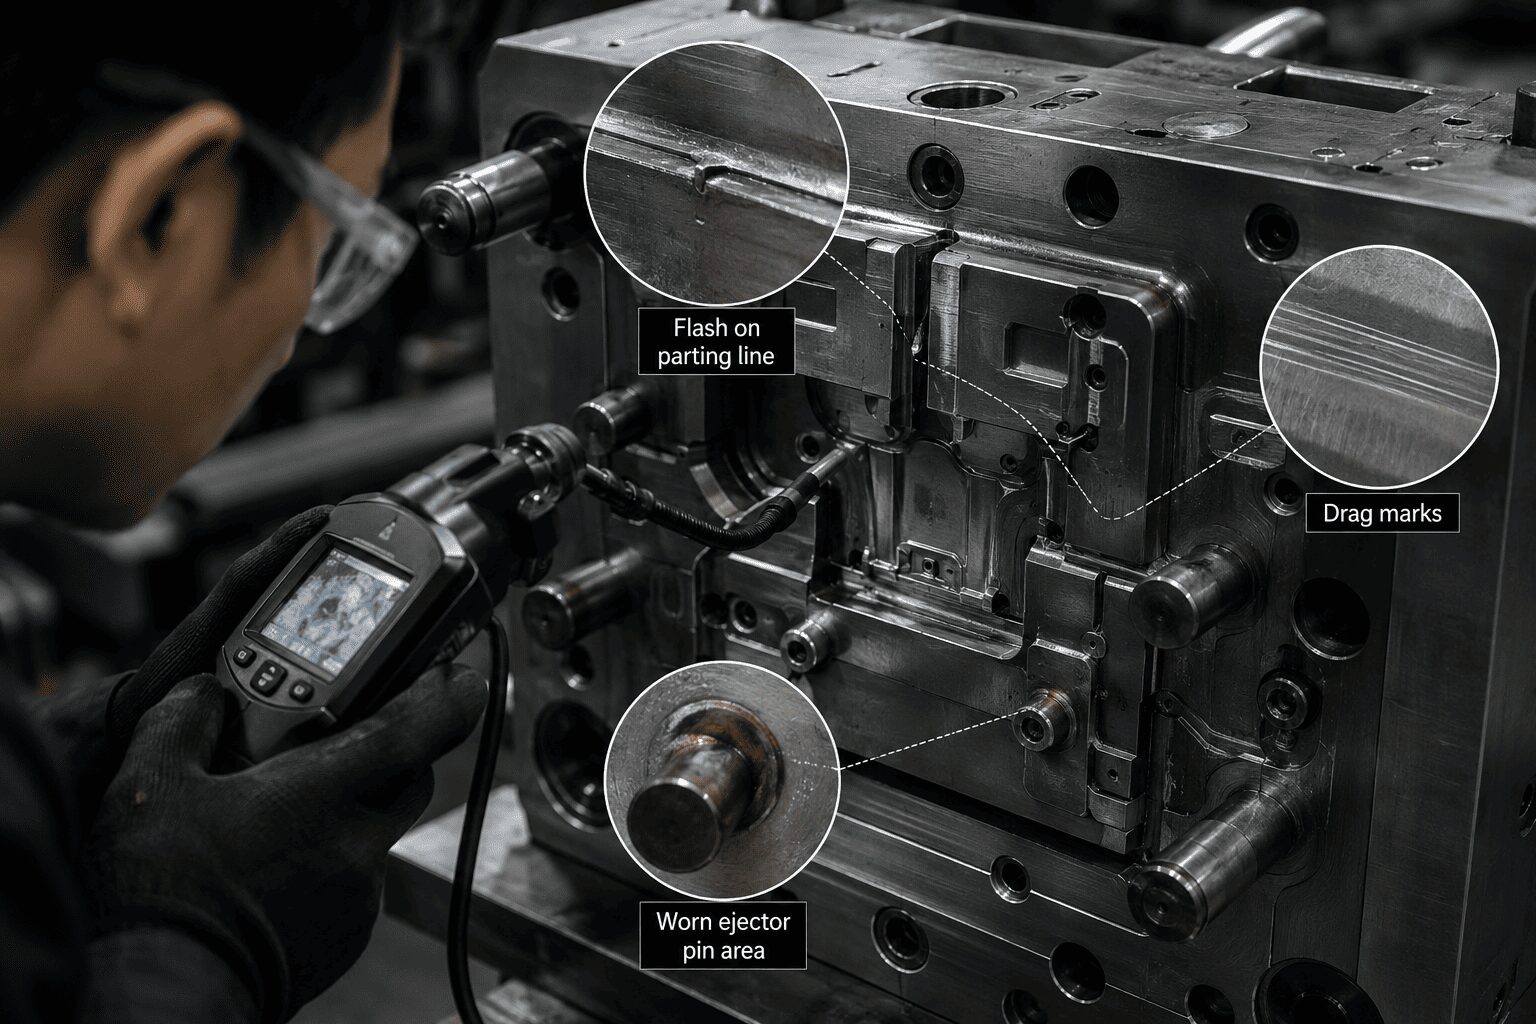
A mould rarely fails all at once. More often, performance slips in small, expensive ways first – flash at the parting line, drag marks during ejection, unstable dimensions, longer cycle times, or a polished surface that no longer looks polished. That is why best practices for mould maintenance matter to any manufacturer running repeat production. A disciplined maintenance program protects tool life, keeps part quality stable, and prevents avoidable downtime from turning into missed deliveries.
In injection moulding, the mould is not just another asset on the floor. It is the core production system that controls geometry, surface finish, repeatability, and cycle consistency. When a tool is well-designed but poorly maintained, even a capable press and a trained team will struggle to maintain output. When maintenance is planned, documented, and tied to real production conditions, the mould continues to do what it was built to do.
Why best practices for mould maintenance directly affect cost
Most buyers think about mould maintenance as a repair issue. In practice, it is a production control issue. The cost of poor maintenance shows up in scrap, sorting, machine stoppages, emergency tool work, expedited shipping, and avoidable schedule pressure. It also affects confidence. If a tool cannot produce the same part reliably from one run to the next, procurement, engineering, and operations all feel the impact.
There is also a trade-off to manage. Over-maintaining a mould can add unnecessary labour and downtime, especially for tools running stable materials and moderate volumes. Under-maintaining it creates a larger risk – hidden wear that turns a simple bench task into a full correction job. The right approach is not “service everything constantly.” It is matching the maintenance level to the tool design, resin type, production volume, cosmetic requirement, and process history.
Build maintenance around the mould’s real operating conditions
The strongest maintenance programs start long before wear becomes visible. They are based on how the mould actually runs, not how a generic checklist says it should run. A tool producing glass-filled resin at high volume will not age the same way as a low-volume mould running an unfilled commodity material. Multi-cavity family tools, hot runner systems, highly textured cavities, and tight-tolerance components each create different maintenance priorities.
That is why inspection intervals should be cycle-based and condition-based, not just calendar-based. A mould that has completed a certain shot count, shown pressure instability, or started generating cosmetic variation should trigger inspection even if it has not reached a fixed date. The reverse is also true. A tool with stable output and low wear indicators may need routine attention, but not a full teardown every time it comes off the press.
Start with disciplined cleaning, not aggressive cleaning
Cleaning is one of the most common maintenance tasks, and one of the easiest to get wrong. Residue from resin, vent contamination, corrosion from moisture exposure, and buildup in water channels all reduce mould efficiency. But excessive scraping, harsh abrasives, and poor chemical choices can damage shut-offs, textures, polished surfaces, and vent geometry.
The best practice is controlled cleaning by component type. Cavities, cores, vents, sliders, lifters, ejector systems, and cooling circuits should not all be treated the same way. A mirror-finish cosmetic cavity requires a different method than a heavily worked support component. Teams need approved procedures for each area so cleaning restores function without removing metal or altering surfaces.
Cooling channels deserve special attention. When cooling efficiency drops, cycle times often rise before anyone identifies the real cause. Scale, rust, or partial blockage in the water circuit can create uneven cooling that affects dimensions, warpage, and overall productivity. Periodic flow verification and cleaning are often more valuable than repeated troubleshooting at the press.
Inspect wear points before they create part defects
Good mould maintenance is less about reacting to damage and more about catching movement early. Wear usually appears in predictable areas: parting lines, shut-offs, gates, ejector pin holes, leader pins, bushings, sliders, lifter faces, return systems, and vent lands. The maintenance team should know where each tool tends to drift and what those early signs look like.
For example, a slight burr at the parting line may signal wear that will become flash under higher injection pressure. Ejector marks may point to binding, contamination, or poor lubrication in the ejection system. Gate wear can alter fill behaviour before dimensions move out of spec. If teams wait for a major quality failure, the mould has usually been warning them for some time.
This is where standard measurement matters. Visual checks alone are not enough for critical tooling. Comparing key features against baseline dimensions, fit conditions, and approved surface standards helps separate normal use from meaningful deterioration. In-house tooling control is especially valuable here because inspection, correction, and production feedback stay connected.
Lubrication should be precise, not excessive
Lubrication is another area where more is not always better. Moving components such as sliders, lifters, angled pins, and ejector systems need the right lubricant in the right amount. Too little increases friction and wear. Too much can attract contamination, migrate into the cavity area, or create process instability.
Material and operating temperature matter. Some lubricants perform well on bench assemblies but break down in production heat. Others may be unsuitable around certain resins or clean cosmetic applications. The maintenance standard should define lubricant type, application point, interval, and quantity so the result is repeatable across shifts and technicians.
Documentation is one of the best practices for mould maintenance
A mould history file is not paperwork for its own sake. It is one of the most practical tools for controlling cost and lead time. Every service event should capture shot count, observed condition, replaced components, corrective actions, recurring defects, and any process notes from production. Over time, that record shows where a tool is stable, where it is vulnerable, and which interventions actually work.
Without documentation, maintenance becomes dependent on memory and individual experience. That creates inconsistency, especially when schedules are tight or teams change. With documentation, decisions become faster and more accurate. A recurring scratch, vent blockage, or slider wear issue can be traced to the root cause instead of being treated as an isolated event each time.
For OEMs and procurement teams, this level of control also supports better forecasting. Tool life planning, spare component stocking, and production scheduling all improve when maintenance data is organised and usable.
Spare parts strategy should match production risk
Not every mould needs a shelf full of replacement components. But critical wear items should not be sourced only after failure. Lead times on pins, inserts, hot runner components, and custom moving elements can quickly turn a short stoppage into a long disruption.
The right spare parts plan depends on part criticality, annual volume, tool complexity, and the time required to machine or source replacements. For high-volume tools or programs with tight service commitments, keeping selected wear parts ready is usually cheaper than absorbing unplanned downtime. For lower-volume programs, a documented rework path may be enough. The point is to decide in advance, not during a production emergency.
Maintenance and processing need to inform each other
One of the biggest mistakes in mould care is treating maintenance and process control as separate worlds. If a mould is repeatedly showing the same defect, the cause may be mechanical, but it may also come from venting limits, clamp conditions, fill pressure, cooling imbalance, or material behaviour. The best results come when tooling, processing, and quality teams review the same evidence.
That cross-functional view often prevents unnecessary benchwork. A part defect does not always mean the mould is damaged. At the same time, process technicians should not be expected to compensate for worn tooling by adjusting settings beyond a safe window. Stable production depends on both tool condition and process discipline staying within their intended range.
At Glasfil, this integrated approach is one reason in-house tooling and moulding control matter. When design, machining, maintenance, and production feedback stay under one roof, problems are solved faster and with fewer assumptions.
Prevent corrosion during storage and transport
Mould maintenance does not stop when the press stops. Tools often pick up damage during storage, inactivity, or movement between facilities. Moisture, poor preservation, unsecured components, and incomplete shutdown procedures can create corrosion or mechanical damage before the next production run even starts.
A proper storage routine includes cleaning, approved rust prevention, release of trapped moisture, protection of vulnerable surfaces, and clear labelling of tool status. If a mould was removed with a known issue, that should be recorded visibly so the next team does not discover it only during setup. For global manufacturing programs, transport preparation is just as important as bench maintenance.
The companies that get the most value from their tooling are not the ones that repair moulds quickly after failure. They are the ones who treat maintenance as part of production strategy. A mould that is cleaned correctly, inspected on the right interval, documented carefully, and supported with the right spares will run longer, produce more consistent parts, and create fewer surprises when delivery dates are tight. That is where maintenance stops being overhead and starts protecting margin.
If you are evaluating a new project or facing ongoing tooling and production challenges, contact us to discuss your requirements, request a technical consultation, or submit your RFQ.